 Photo Photo: Andreas Praefcke, Public domain

Carving camp gear
Tent pegs, a pot hook, a spoon and a pot lifter, made with a knife and a bit of wood.
What you need
- A sharp knife with a fixed blade or a locking blade
- Green wood: birch, alder or maple for spoons, any straight hardwood for pegs
- A small saw or an axe to cut the blanks
- A stone or strop to touch up the edge as you go
How
- Cut green wood a little bigger than the finished piece. Green wood carves far easier than dry.
- Sit down, brace your elbows on your knees, and work away from your body.
- For a tent peg, cut a stick as thick as your thumb, point one end, and cut a notch near the top for the line to sit in.
- For a pot hook, find a branch with a fork, cut one arm short to make the hook, and notch the long end to hang from a line.
- For a pot lifter, leave a short stub on a straight stick so it catches the bail of the pot.
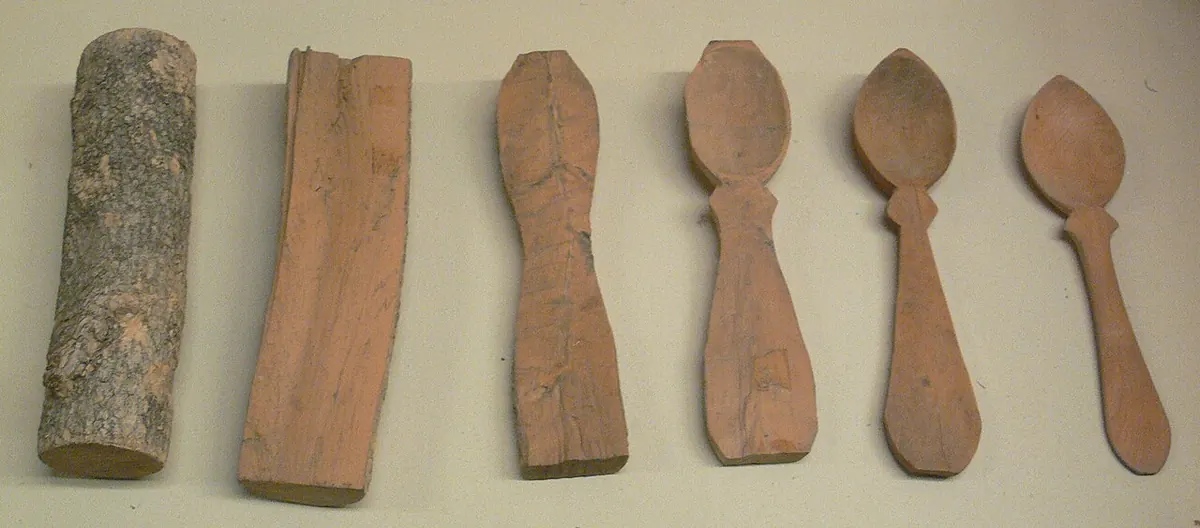
- For a spoon, split a straight piece, draw the shape, rough it out with the knife, and hollow the bowl slowly with the tip.
- Let a spoon dry slowly in the shade for a few days so it does not crack.
Do and don't
Do
- Keep the knife sharp. A dull blade needs force, and force is what slips.
- Use a thumb push on the back of the blade for small, careful cuts.
- Stop and rest when your hands get tired.
Don't
- Do not carve toward your hand, your leg or your belly.
- Do not carve with the wood braced on your thigh. The big artery runs along the inside.
- Do not cut green wood from a tree that someone owns or a park protects.
Watch for
Danger
- A knife that skips off a knot goes wherever your hand was pushing it. Slow down at knots.
- A cut hand in the bush is a trip ender. Keep a first aid kit handy. See Cuts and infection.
- Folding blades without a lock can close on your fingers.
Notes
A few pegs, a pot hook and a lifter save weight in the pack and make a camp work better.
Carving is also good time at the fire. A spoon takes an evening or two and lasts for years.
Updated 2026-09-28
Related
 Batoning and feather sticks
Tools and Blades
Splitting small wood with a knife and a stick, and carving curls that catch a flame when everything else is wet.
 Choosing a knife
Tools and Blades
The one knife that does most camp and field work, what to look for, and how to use it without cutting yourself.
 Sharpening a knife
Tools and Blades
Getting a working edge back with a stone and a bit of patience.
 Axe and saw work
Tools and Blades
Cutting wood without cutting yourself, and keeping the edges alive.